DIY Lemons for A Summery Home
Posted by ADMIN

 {Part of the purpose of Pink Salt Riot is to give women everywhere tools to help them live lives of authentic joy in Christ. And part of how I plan to do that? By sharing amazing and beautiful recycled DIY projects.
Wait, what?
Yes, I know. Not exactly the first thing that pops into your mind, is it? Learn more about why I feel recycled DIY is an important addition to my mission in this post, and get the down low on everything you need to get started right here.}
Home décor just makes me so happy. I love having an open home where friends and family know they are welcome any time. I think that having a simply and tastefully decorated space makes a house feel like home and therefore that much more welcoming. But the idea of spending $160 (yes, true price tag I saw the other day) on a fake floral arrangement is just not our style. It seems to me like it would be better to DIY some décor myself and spend the money on plenty of goodies to have on hand to feed surprise guests!
Lemons are being used in a lot of spring and summer décor lately and that has inspired me! I looked at some fake lemons at the store the other day and was shocked at how much they were, so I decided they were a great DIY challenge.
Much like the topiaries from earlier this week, old newspaper is the MVP of this DIY. The hardest part is getting the lemon shape you want, but luckily you can just keep adding paper and tape until you’re happy with it. I have also included a bonus easy leaf DIY!
Here’s what you need for the lemon:
{Part of the purpose of Pink Salt Riot is to give women everywhere tools to help them live lives of authentic joy in Christ. And part of how I plan to do that? By sharing amazing and beautiful recycled DIY projects.
Wait, what?
Yes, I know. Not exactly the first thing that pops into your mind, is it? Learn more about why I feel recycled DIY is an important addition to my mission in this post, and get the down low on everything you need to get started right here.}
Home décor just makes me so happy. I love having an open home where friends and family know they are welcome any time. I think that having a simply and tastefully decorated space makes a house feel like home and therefore that much more welcoming. But the idea of spending $160 (yes, true price tag I saw the other day) on a fake floral arrangement is just not our style. It seems to me like it would be better to DIY some décor myself and spend the money on plenty of goodies to have on hand to feed surprise guests!
Lemons are being used in a lot of spring and summer décor lately and that has inspired me! I looked at some fake lemons at the store the other day and was shocked at how much they were, so I decided they were a great DIY challenge.
Much like the topiaries from earlier this week, old newspaper is the MVP of this DIY. The hardest part is getting the lemon shape you want, but luckily you can just keep adding paper and tape until you’re happy with it. I have also included a bonus easy leaf DIY!
Here’s what you need for the lemon:
- Newpaper
- Masking tape
- White paper
- Yellow Tissue Paper
- White glue
- Water
- Paint brush
- Green paper (or white paper and green paint)
- White glue
- Binder clip or clothespin

Step 1
Crumple your newspaper into a ball. There are two easy ways to make the lemon shape depending on whether you want it more round or more elongated. I found for a rounder lemon that it was best to crumple, roll into a ball, and tape, and only then pinching out a little bit at each end to make the lemon shape. For a more elongated lemon, crumple the newspaper into the space between your two cupped hands and tape. Whatever shape you are left with at the end of this step will be the final shape of your lemon, as the tissue only adds color and not bulk. Its worth it to take your time and make sure you are happy with the shape. An easy way to fix the shape is to rip smaller pieces of newspaper and crumple against the lemon and tape to fix divots or uneven spots.

Step 2
Mix 2 parts glue and 1 part water to make a thin glue. Cut your yellow tissue paper into long strips. I did this by folding a sheet of tissue over several times and cutting through all the folds at once.
Step 3
Dip a strip of tissue in the glue mix. Wrap it around the lemon, catching drops and smoothing it out with the paintbrush. Continue until there is a layer all over the lemon. Let dry.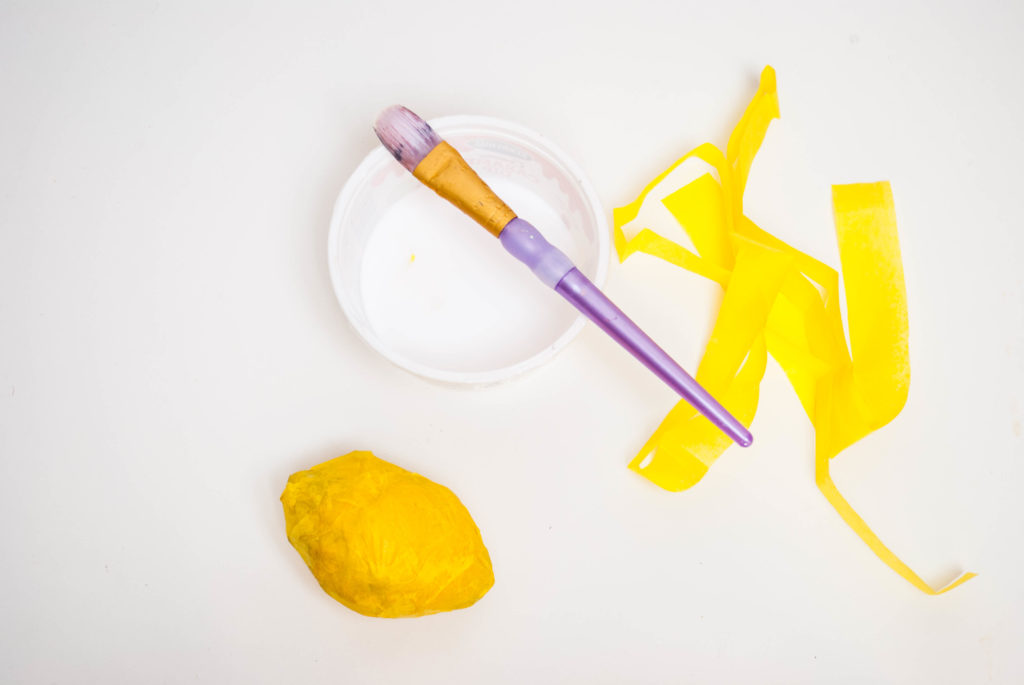
Step 4
Give the lemon another layer of tissue strips. Let dry.
Step 5
Make your leaves. Cut a triangle off the corner of a sheet of green paper. Starting at the corner, fold back and forth like an accordion. Pinch in the middle and bring the two ends of the longest side together and glue, holding with a binder clip or clothespin. Done! What do you think of my lemons? They aren’t do much a finished product in and of themselves, although they could be, but I think they are a great starting point for even more décor projects like wreaths, arrangements, and centerpieces.
Do you DIY your home décor? How would you use some lemons in your décor? Let me know in the comments!
Done! What do you think of my lemons? They aren’t do much a finished product in and of themselves, although they could be, but I think they are a great starting point for even more décor projects like wreaths, arrangements, and centerpieces.
Do you DIY your home décor? How would you use some lemons in your décor? Let me know in the comments!

TAGS:
SHARE:
